Knowing how they encourage DIY projects, I figured I'd have to do a couple and get them on my blog so when I applied, I would be a more appealing candidate. The benefit of these first couple of projects to my actual wedding were very very secondary. Whew! I feel good for getting that out.
I saw, on the lovely wide world web, lots o' DIY project of hand-made things for the bride and groom to hold while posing for pictures. Some say "thank you" and then are used for special order thank you cards for after the wedding.
I loved this idea and thought I could incorporate it into something fun as one of my first DIY projects. I wanted to make a banner for our STDs (hehe, still funny even though Bee after Bee has immaturity moments with this).
Bunting seemed like the easiest thing to do, so I went with it. A trip to Michael's secured all the supplies. And a large dining room table to use courtesy of Mima Kettle supplied the work area. I went to Michael's to pick up supplies for this and my other DIY project (a "thank you" wreath).
When I got back to the house, I set to work. It was a lot of steps and because I was working on both projects at once, it took all day. Plus I ran out of ribbon and had to take FNIL Tiny ('cause she's tiny) with me to Wal-Mart to find more. But FSIL Hon helped out tremendously. When I told her I was taking pictures in hopes of blogging about it in the future, she refused to let more than her hand be photographed, but I will get more shots the next time she's back stateside.
 |
| That's FNIL Tiny. She's waaaay high up in the tree in front of Mima Kettle and Kettle Dad's house. She's very helpful and she's going to make a great jr. bridesmaid! |
At Least 11 large pieces of felt. I got felt from Michael's in 8.5 by 11 sheets. I got two different colors from our wedding palette. Felt was better for us since our e-pics were being taken outside and I didn't want the wind to affect our photos.
Lots and lots of buttons. I think I bought a pack of 50 assorted white buttons, and that was just enough, no more no less. I picked that color so they'd stand out. I thought about painting them, but decided against it once I saw what the white looked like.
Glue sticks and a glue gun. This was my first time using one. It was pretty easy to figure out. You almost burn yourself once and you tend to avoid doing it again.
Ribbon. For the edges of the bunting triangles, the highlight of a sparkly ribbon make it stand out even more and camouflaged any uneven cuts. I ended up needing two spools of whatever the standard length is they sell on the spool at Michael's and Wal-Mart.
Scissors. If I have to explain why you need this, well never mind. You need scissors to cut the bunting triangles, the ribbon, etc.
String. You need something to string your triangles onto I chose a sparkly tan and gold string that FSIL Hon braided to make stronger. We didn't cut the length though on the chance we could re-use it for something.
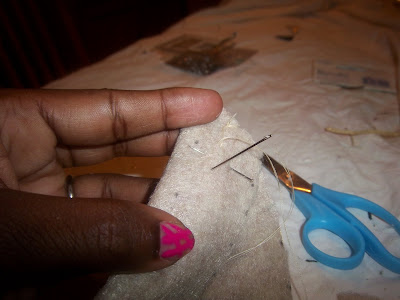
Needle & Thread. Get a short yet strong needle and get thread that's also strong and closely matches the color felt you buy.
 |
| FSIL Hon's hands gluing ribbon onto the edge of a cut-out triangle. We put the ribbon on first so we'd know how much space we had to measure out each letter in buttons. |
 |
| If you look closely, you can see a ring of glue I put on the button. I glued each button into place one at a time so as to not mess up the lovely layout my new family worked so hard on. |
 |
| I pinned the flap down and got to work sewing. Please ignore the crazy nails. |
 |
| She continued to help by sitting on top of the thread and holding up progress while we took a wine break. Kitty Pot doesn't think she's people like Kitty Kettle does. She knows she's a cat. |
 |
| Kitty Pot then thought it wise to try and drag our entire bunting upstairs to play with. That's when the fun and games ended. She was not about mess up my first big hours-long project! |
 |
| Our finished project looked lovely. We hung it on the curtain thingees so we could see what it looked like. Success! |
I think I finally understand the term bride brain. I still think making that bunting was a good idea...
How did your first DIY go? Did it make you want to do more? Did you get help from family (human or not?)


2 comments:
I love the banner buttons CeCe and ofcourse those gorgeous cats!
Thanks! I literally just grabbed a bag of buttons from Michaels, and my FSIL did all the layout. She's such a gem!
Post a Comment