Showing posts with label FNIL Tiny. Show all posts

Tuesday, August 30, 2011

You're Not Seeing Double, No Need To Adjust Your Screen

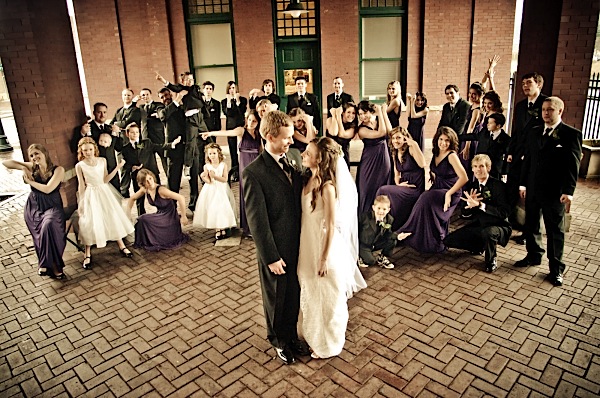
In our wedding, we have lots o' people. That may have been mentioned once or twice so far. Our wedding will look like this:

Image: 34 Person Wedding Party / Photography by Digital Photography School
That wedding had 34 people. Ours is just shy of that. We are including everyone in our count because they're all important. Mr. Kettle and I both have a Best Man and Maid of Honor. So that's 4.

He has 8 more groomsmen, bringing our total to 12. I have 2 more men standing up with me which brings our total to 14. I also have 6 more bridesmaids, bringing our total to 20. Add in 2 jr. bridesmaids and we're at 22. Then 2 ring bearers and 2 flower girls and we're at 26. Tack on 3 hostesses and 2 ushers and the number is now 31. Don't forget our 2, yes 2, officiants and we're at 33. Don't forget Daddy Kettle, Mr. Kettle, and me. That makes 36! Yup. 36 people.

I want to take this time to answer I've gotten in comments on previous posts. The question was about our hostesses and ushers and what exactly they were. Some people double groomsmen as usher, helping to seat people as they arrive to the ceremony. That's not the case with us.

Momma Kettle, ever the etiquette stickler (I get it honest, you know, so I  know exactly what to rebel against), tells us we should have one usher/hostess for ever 50 guests. This is particularly important when our venue is at a house that has thousands of square feet spread over 3 stories. We'll need people to help get all those people into the ballroom conservatory for the ceremony, out to the rest of the house for cocktail hour, then back into the ballroom for the reception. They'll need to know where to sit and when. The mansion provides staff to do this, but having extra people on hand could only help out.

Think of a combination between a hostess at a restaurant mixed with a regular usher at a wedding, and that's what our hostesses and ushers will be. Why not make them honorary bridesmaids and groomsmen? Well, because then they'd get their names on the programs and we'd get no work out of them! Just kidding, but I know they'd want to be involved more than just in name.

One of our hostesses is my niece, Hostess Cheery, who's 19 and too old to be a jr. bridesmaid. The other is a high school girl I mentor, Hostess High,  who's friendly with Mr. Kettle ever since they were both in the wedding I met Mr. Kettle at last summer. The third is one of his nieces, FNIL Sniffles, who's also in college and also to old to be a jr. bridesmaid. One of our ushers is my god-brother and the other is Mr. Kettle's cousin. They're both in high school.

Our wedding has been used as a tool to accommodate all our close family and friends that have been in our lives for a long time. Besides the flowers girls and ring bearers who are both 6 years old, we've known everybody else in our wedding party at least 10 years (including the officiants).

So, yeah there are a lot of folks, but they're our close friends. We're both just super friendly people who are close to our families. It happens.

And now for your viewing pleasure, some lovely photos of random wedding party members.
Personal Photo: our two flower girls. My lovely new nieces. Aren't they adorable twins?


Personal Photo: our two ring bearers. They're also twins, they just don't look it as much.

Personal Photo: FNIL Sniffles and Hostess High at our engagements party.

GM Hubby, MOH Sis, GM Mac, Mr. Kettle, GM Cuz, GM Light at the engagement party. I really should do something special for whoever can keep all these folks straight!

BM Doc, BM Mon, BM Law, BM Libra, BM Milk, me at our engagement party
 BM in this case stands for Bridesman and Bridesmaid. We're still sorting out exactly what to call everybody in our wedding party.

Personal Photo: GM Dark at a gig we all went to. I love the look on his face. He was resigning himself to being the only single and never-married one of his friends. His level of melodrama fits in nicely with Mr. Kettle and I.

Personal Photo: I love this pic.
From left to right: FNIL Tiny, Mr. Kettle, FNIL Sniffles, and BM Cuz's daughter who's my new great-niece.
Soooo many people. Judging by the engagement party, I know our wedding will be exactly what we want: a big party that includes all the people we love and cherish. I will now stop alluding to our engagement party and actually give recaps in my next posts.

Tuesday, August 16, 2011

Trying To Clothe The Kettle Ladies

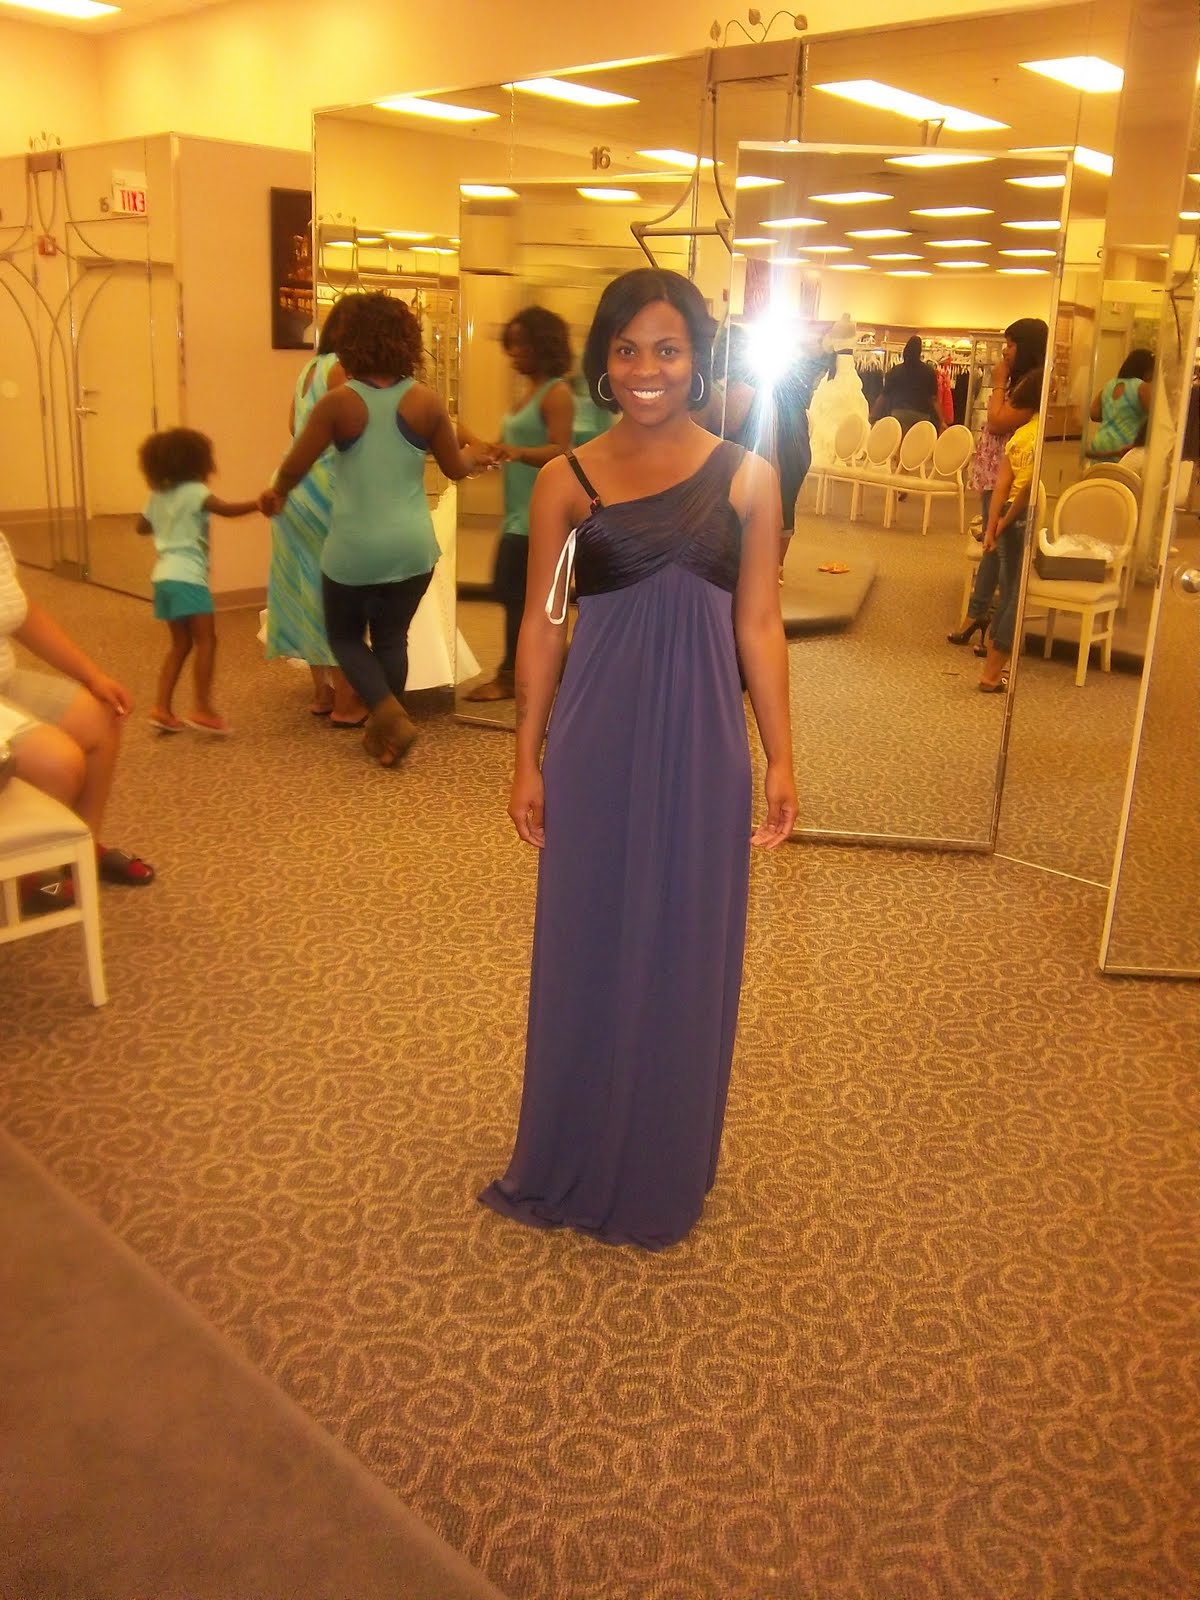
I didn't want to make a big production of finding bridesmaid dresses. I had my maid of honor and Easy's maid of honor look online for the last month or so. We found a couple of great options. David's Bridal seemed to be the place to go to in order to fit into a certain price range and style selection. I made an appointment for a Wednesday when most everyone was available.

My maid of honor, MOH Indy, lives in NYC, so she wasn't available. But Easy's maid of honor, his sister was available. As were her twin daughters who are our flower girls. Also available were all my bridesmaids except one. Our two junior bridesmaids were also there to try on dresses. Throw in my mother, Easy's mother and sister, and we have a group of 14 females, only 4 of whom weren't trying on a single dress.

It was so much more fun than you could imagine. I was going around ooh-ing and aah-ing at all the pretty dresses and taking pictures. The flower girls didn't want to take off their "princess dresses".
Personal Image: Vera Wang shoes that we still drool over in memory.

Personal Image: BM Shorty trying on a dress I'd love if it didn't look like it was trying to be a one-shoulder gown.

Personal Image: One of the twin flower girls looking adorable in a princess gown.

Personal Image: BM shorty in yet another that didn't make the cut. Just too much... everything.


Personal Image: both twin flower girls in more pretty dresses. The one on the left is the one we ended up going with.


Personal Image: JB Cousin trying on a possible jr. bridesmaid dress, right color, but not quite perfect.

Personal Image: FNIL Tiny trying on another jr. bridesmaid dress contender. I was feeling this one since we were leaning toward satin at first.

Personal Image:  BM Law trying on a nice dress that I loved more for the cummerbund waist than anything else.

Personal Image: BM Libra looking good in everything she puts on, as usual. I really liked this one, so we had our coordinator round up some more of this in everyone's size.

Personal Image: BM ATL, with whom we hadn't been having much luck, looked super cute in this one too.

And then something magical happened.
Image: Magic Desktop Wallpaper via Wallpapers Desktop DiQ

Somehow, one dress looked great on every single bridesmaid. And it just so happened that the only 2 who weren't there look good in literally everything they wear.

I was so excited. They didn't have my color swatch match though, major color fail. I thought of the Thank You wreath I'd worked so hard on. But then I realized this dress looked good on every single bridesmaid. I had achieved something that should have been unachievable with that many girls, so I focused on what really mattered in that moment. I asked for all the options in purple.
Personal Image: All the options in purple.


Our coordinator went to get the swatches and we picked this lovely color that looked like a rich purple but photographed kind of blue. That made me super excited because blue is the color I originally wanted.

I had all the ladies pose for one giant photo as proof that they truly all rocked the dress. I could see it in that great purple-y blue color. I was already editing invitations and color schemes. It would epic! It would legen-wait-for-it...-dary!
Personal photo: even ill-sized and wrong-colored, they all look fabulous!

And then...

Image: Luke Himself


Our happy parade came to a screeching halt. She informed us she was mistaken about the dress being available in that color. The only options were a horrific burgundy color and this other dusty de-saturated purple-y shade.

I was immediately ready to leave the store. She apologized too many times and I told her we were going down the street to Eva's Bridal. We will still be getting our flower girls' dresses from there though, since they would coordinate perfectly with my dress.

We went to another store where things only got worse. I thought the dress shopping would be hard because of all the different body types. But nope, it was something else entirely.

This post by no means should reflect poorly on David's Bridal. The dress had just been changed to unavailable in my color a day or two before our appointment. And anyone who can deal with the dress flurry fury we presented with deserves a big hug or a cookie or maybe even some sort of award.

Tuesday, August 9, 2011

D-I-Y Didn't I Outsource... A Banner For Our Save-The-Date Mailings?

Hive, I have a confession. I'm crafty, but my intentions are not pure. When I first discovered Weddingbee, the blogger in me was dying to become a part. I wanted to be a Bee blogger so bad.

Knowing how they encourage DIY projects, I figured I'd have to do a couple and get them on my blog so when I applied, I would be a more appealing candidate. The benefit of these first couple of projects to my actual wedding were very very secondary. Whew! I feel good for getting that out.

I saw, on the lovely wide world web, lots o' DIY project of hand-made things for the bride and groom to hold while posing for pictures. Some say "thank you" and then are used for special order thank you cards for after the wedding.

I loved this idea and thought I could incorporate it into something fun as one of my first DIY projects. I wanted to make a banner for our STDs (hehe, still funny even though Bee after Bee has immaturity moments with this).

Bunting seemed like the easiest thing to do, so I went with it. A trip to Michael's secured all the supplies. And a large dining room table to use courtesy of Mima Kettle supplied the work area. I went to Michael's to pick up supplies for this and my other DIY project (a "thank you" wreath).

When I got back to the house, I set to work. It was a lot of steps and because I was working on both projects at once, it took all day. Plus I ran out of ribbon and had to take FNIL Tiny ('cause she's tiny) with me to Wal-Mart to find more. But FSIL Hon helped out tremendously. When I told her I was taking pictures in hopes of blogging about it in the future, she refused to let more than her hand be photographed, but I will get more shots the next time she's back stateside.

That's FNIL Tiny. She's waaaay high up in the tree in front of Mima Kettle and Kettle Dad's house. She's very helpful and she's going to make a great jr. bridesmaid!
To Make a Save-The-Date Bunting, You'll Need:

At Least 11 large pieces of felt. I got felt from Michael's in 8.5 by 11 sheets. I got two different colors from our wedding palette. Felt was better for us since our e-pics were being taken outside and I didn't want the wind to affect our photos.

Lots and lots of buttons. I think I bought a pack of 50 assorted white buttons, and that was just enough, no more no less. I picked that color so they'd stand out. I thought about painting them, but decided against it once I saw what the white looked like.

Glue sticks and a glue gun. This was my first time using one. It was pretty easy to figure out. You almost burn yourself once and you tend to avoid doing it again.

Ribbon. For the edges of the bunting triangles, the highlight of a sparkly ribbon make it stand out even more and camouflaged any uneven cuts. I ended up needing two spools of whatever the standard length is they sell on the spool at Michael's and Wal-Mart.

Scissors. If I have to explain why you need this, well never mind. You need scissors to cut the bunting triangles, the ribbon, etc.

String. You need something to string your triangles onto I chose a sparkly tan and gold string that FSIL Hon braided to make stronger. We didn't cut the length though on the chance we could re-use it for something.

Needle & Thread. Get a short yet strong needle and get thread that's also strong and closely matches the color felt you buy.


A paper template of the shape I wanted each triangle of fabric to have. I did this quickly on Microsoft Word. I stacked the felt and started cutting, not the smartest way to do it. If done over, I could cut out the shape, just pin it to each sheet individually and cut it out. It's felt, so it doesn't matter if you cut in the perfect center of each sheet.


FSIL Hon's hands gluing ribbon onto the edge of a cut-out triangle. We put the ribbon on first so we'd know how much space we had to measure out each letter in buttons.

This isn't the best quality photo, but it's trying to show you to put the glue on only a little at a time. And the glue goes along the edge, but completely on the front, not the side of the triangle. As you're pressing the ribbon in place, be aware that it's hot, get a cook (like me!) who's used to touching hot pots to help. Also, don't cut out ribbon lengths ahead of time, you'll just waste ribbon.


This is what you should have on your hand after gluing the ribbon to the edges of each triangle. This was important to do first so we'd know just how much space we had to place out each letter in buttons.


FSIL Hon and Mima Kettle put a lot of time into making these letters just right. I would have just laid them down randomly and gone to work. They look much better with the organization and symmetry I must admit. All the rest of the stuff on the table is from the Thank You wreath I also did that night.


If you look closely, you can see a ring of glue I put on the button. I glued each button into place one at a time so as to not mess up the lovely layout my new family worked so hard on.


We laid out each letter after it was glued to admire our work and figure out what to do next. At this point MOH Sis (Mr. Kettle's maid of honor and sister) came in and expressed her wish that she could be as crafty as us. I offered to teach her and got a nice non-committal "sure"


I'd planned on folding the top rectangle over to make a tube on which to string the bunting, but I hadn't yet figured out how. It was at this point I decided needle and thread would be the safest, most durable (pesky Windy City), but not quickest way to get this done.


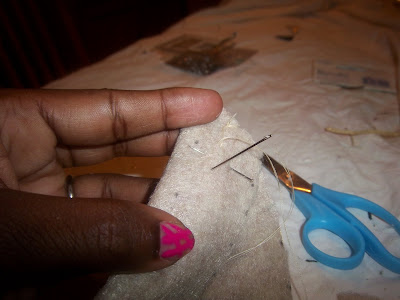
I pinned the flap down and got to work sewing. Please ignore the crazy nails.
 

On the front side of the triangles, I made sure to put the needle back through as close as I could to where it came out. I wanted that invisible seam look you'd get on hemmed pants. That way, from the front, all you could see was lovely magically together bunting.
 
After I sewed the flaps down, we noticed it needed more definition. Though we were tired at this point, we kept going. The glass of wine Mr. Kettle poured us helped. I glued the ribbon down across the top and it looked sweet!


Did I mention Mr.Kettle also has a cat? She lives with his parents and will stay there since she doesn't have claws but my cat does. Since she's black, her name will be Kitty Pot (like the pot calling the kettle black when it's black? Get it? No? There go those crickets again.) At this point, FSIL Hon is trying to see about stringing her braided string through the triangles and Kitty Pot had to get in on all the string action. It's her way of helping.


She continued to help by sitting on top of the thread and holding up progress while we took a wine break. Kitty Pot doesn't think she's people like Kitty Kettle does. She knows she's a cat.

Kitty Pot then thought it wise to try and drag our entire bunting upstairs to play with. That's when the fun and games ended. She was not about mess up my first big hours-long project!

Our finished project looked lovely. We hung it on the curtain thingees so we could see what it looked like. Success!


Belle will now be called Kitty Kettle, named by Weddingbee! She's giving me her Family Guy disapproval eyes cause I was trying to snap her picture before heading to work when she wanted to eat. She really thinks she's people y'all.
I'd have to say this first big DIY project was a success even though I though it would take 2 hours top and it took closer to 9. But it turned out beautifully. You guys will love our e-photos with it. All that work for one freaking photo!!

I think I finally understand the term bride brain. I still think making that bunting was a good idea...

How did your first DIY go? Did it make you want to do more? Did you get help from family (human or not?)