Showing posts with label wedding colors. Show all posts

Wednesday, April 11, 2012

Doing The D-I-Y: Flower Girl Baskets

After finally finishing the ring bearer pillows, I wanted to get the matching flower girl baskets done. I scoured for the perfect baskets, purchased them, and then watched them on my kitchen counter for months before I finally found the motivation to decorate them.

Personal Photo: searching through what felt like endless options.

Personal Photo: Narrowing it down and moving baskets around to get a group shot of my options.

Personal Photo: Making a selection!

Personal Photo: Loading up all the supplies. Feeling overwhelmed.
My glue gun and I got real friendly that night I finally got it together. I took me a couple hours, but it was worth it. And now for a montage. Everybody likes a montage. Even Rocky had a montage! (Anyone get that reference? America! F*#k yeah? Moving on)
sdf

Personal Photo: Step 1) Gather your supplies. In my case, it was just the matching ribbons from the ring bearer pillows and my trusty glue gun. Make sure you have plenty of glue sticks on hand.

Personal Photo: Step 2) Cut tulle and glue to bottom of basket. In the photograph, you could see where it was doubled up, but in real life, it looked uniform. Don't use too much glue here, or your fingers will be burned when you press down the tulle into the glue.

Personal Photo: Step 3) Glue ribbon along edge of basket. First, I glue the edge closest to the rim. Then I went back along the bottom edge and glued it into the nooks and crannies so the ribbon hugged all the curves of the basket. Otherwise, the ribbon's end will stick out and will look the opposite of neat.

Personal Photo: Step 3) I wound ribbon around the basket handle to create a criss-crossing look. Do this with as many different ribbons as you'd like. Make sure you leave a length of ribbon on either end if you want to have hanging ribbon from the basket.
Personal Photo: Step 4) Wind end of ribbon around the rim of the basket. This only works if the weaving of the basket winds like the ribbon. cut the ends hanging from either side so they are even. Go back over the ribbon and glue down the parts that the eye won't see to secure the ribbon.

Personal Photo: These are bits of ribbon I cut into short pieces to make a decoration on the basket.

Personal Photo: Step 5) Glue cut pieces together at angles to look like flower petals. Start with a simple cross, then add other pieces at 45 degree angles. Be liberal with the glue gun because you don't want to have to repeat any of these little pieces.

Personal Photo: Step 6) Attach your "flower" to the side of the basket. I put one on each side of each basket. That was a lot of little pieces to glue. A lot of pieces. Also, at this point, you can trim the hanging ribbon into a shape if you'd like.

Personal Photo: Step 7) Admire your work.


Personal Photo: Here are the baskets with the pillows. They ended up matching perfectly!

Wedding Image showing flower girl baskets in action


Thursday, April 5, 2012

Doing The D-I-Y: Ring Bearer Pillows

Okay hive, if you've kept up with my posts and managed to separate me out in your head from all the other fabulous bee bloggers, you know I've mentioned these darn ring bearer pillows a number of times. As we approached the wedding, and I was feeling heavy levels of resentment, this is one of the only wedding projects I managed to actually do myself.

I'd given sewing the pillows a couple of tries. I don't know why I insisted on doing it all by hand, but I did. This post will only be a step-by-step instruction manual for someone who already knows how to sew pillows by hand.
Personal Photo: Gather supplies. This was several spools of ribbon to be chosen for decorating later.

Personal Photo: Can't forget pillow stuffing.

Personal Photo: Needle, thread that perfectly matches your fabric, fabric glue, and rings for attaching anything you'd like.

Personal Photo: Step 1) Trace pattern onto fabric for exact pillow shape. I made two because I had two ring bearers. If you're decorating with ribbon, select choices and cut to a length that is just longer than the width of one side.

Personal Photo: Step 2) Pin decorative ribbon in such a way that the stitches of the pillow will secure it in place. Believe me, this is much easier than trying to sew the ribbon into place later, make sure the pins are secure and are holding the ribbon symmetrically and evenly.

Personal Photo: Step 3) Invert fabric and pin around the perimeter, making sure the decorative ribbons are secure in the right spot. Begin sewing the pillow, leaving about 3 inches not sewn together on one side. Take care to make sure the corners are reinforced.

Personal Photo: Step 4) Cute excess fabric off the sides of the pillow. Check over each seam to make sure they are secure as you don't want puckering when you flip your fabric right side out. This part will be sooo much easier if you just use a machine to do your sewing.

Personal Photo: Step 5) Accept help from your cat so she doesn't steal your thread. I made sure she didn't eat any thread, since I learned here on Weddingbee that can cause disastrous results.

Personal Photo: Step 6) Stuff your pillow. If you are making more than one pillow, stuff them all so you are sure they're the same amount of fluffy. Try not to pull on the open edges where your stitches began. Having to re-sew those later will be a pain.

Personal Photo: Step 7) Attach rings. This is just a sample I tried, but you can see the rings more clearly here. I stitched around the rings through the ribbon and the pillow. Tight, close loops around it will hold it in place. You can put the rings right next to each other or further apart.

Personal Photo: Step 7B) I wanted to add some curl to one of my decorative ribbons, so I found a bottle with the perfect size for the curls and went for it. Cut the length of ribbon you want, wrap around the bottle, and secure with a rubber band. I left mine for a couple weeks to ensure it would stay curled. It's still curled now 8 weeks after the wedding.

Personal Photo: Step 8) Add curled ribbon to the rings you've sewn onto the pillow. Arrange as you'd like. You can even add in another stitch to make sure they stay in place.

Personal Photo: Step 9) Admire your completed pillows. Also, plot for matching flower girl baskets.

Wedding Image showing Ring Bearers in action

Saturday, January 7, 2012

Configuring The Kettle Tea Party: Wedding Favors

Hi hive. I know I've been missing for a while...

Image via ishqinabackpack blog
Twenty days to be exact. I'm sorry about that. Really, truly, I will do better. But the holidays were a rough time. I can't even remember the last time I uploaded the pictures from my camera into my computer.

I've been keeping up with your activities, commenting here and there as I found a lone free minute at work. I promise to be a better worker bee from here on out.

I've been up to a lot. I finished the ring bearer pillows (finally). I finished purchasing the gifts for the bridesmaids, and picked out the gifts for the men. We started getting RSVPs back in (and only one family said no, yikes!!). There's been a lot.

But this post isn't about any of that. As the title says, it's about favors. Our favors had to fulfill a number of purposes. 1) They had to fit our theme. 2) They had to fit our color scheme. 3) They had to do double duty because we weren't having place cards on some table at the entrance to the dining hall. 4) They had to be pretty and/or shiny.

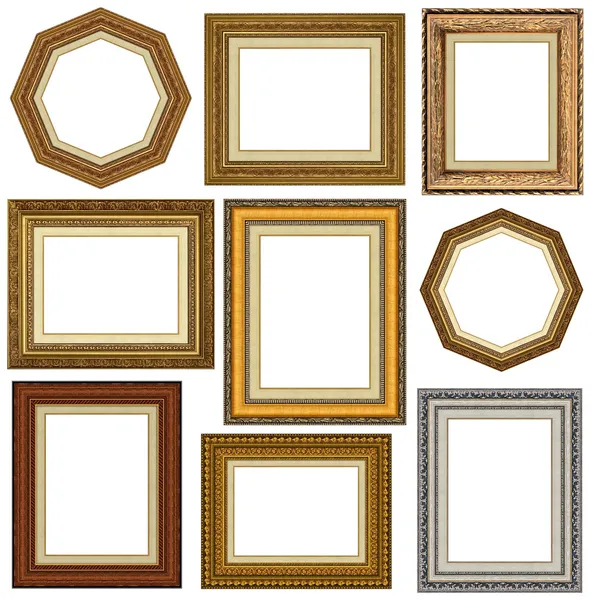
That being said, there was really only one option: gold picture frames!

Image via depositphotos.com
Momma Kettle bought samples of several frames. After comparing for price, durability, and checking if it was the "right" gold, she landed on the perfect frame. She ordered them in bulk and now we have our favors.

We just have to find the time to fill them all in with the place card names we'll make for each guest. Thank Gawd we have a day-of coordinator. It will be the job of her and her team to get those tiny little frames to the right spots for the 20-30 tables next month.

Next month! It's getting close now.

What did you use for favors? Did you go useful, tasty, or just plain pretty?

Wednesday, October 19, 2011

Dress Shopping With My Momma

My dress is already ordered. The bridesmaid dresses are already ordered. If you read my last post though, you'd know there were still a number of women involved with this wedding who weren't yet dressed.

When I talked about Momma Kettle's wedding clothes options, I thought she might be leaning more towards getting a suit, like what Grandmother Kettle got. But, I was completely off. When I mentioned that I figured she'd look best in something similar to what she wore for my cotillion, she seemed a bit un-enthused.

Turns out, she definitely had an evening gown in mind, but not one like she wore at the cotillion. The cotillion had all these rules about what had to be covered and her dress had long sleeves. For the wedding, she had something a little less... covered in mind.

Off we went to West 95th street, in search of a bridal shop. I'm not sure whether or not we ended up at the same place Mima Kettle got her dress from or not. We just stopped at the first store we saw. We went inside and met a lovely young woman who got us started on finding the perfect mother-of-the-bride gown.

I showed her some pictures Momma Kettle and I brought from a magazine to give her an idea of what we were looking for. She found a couple dresses that fit the basics and we went to the dressing room. It was really nice to be on the other end of the dress trying on.
Personal photo: My chair set up at the viewing area outside the fitting rooms
She began trying on dresses. The first one she put on fit our requirement of a very elegant dress. All the dresses are in colors that may not necessarily be what we would've ordered them in.
Personal photo: This dress was very elegant and pretty. But it wasn't much besides that And the train, while beautiful, could possibly interfere with my mother's dancing on the wedding night. Momma Kettle is a dance machine!

Personal photo: Neither of us really loved this dress. But seeing this photo now, it looks pretty amazing. But we still ruled it out while we were still at the store.

Personal photo: After seeing the elegant dress, we wanted to see a fun dress. This dress was definitely fun!

Personal photo: There was a bolero that went with it that we loved. there was also a train/cape thingee that we couldn't figure it out.

Personal photo: At this point we were having too much fun! After not being able to figure out what the train was doing, we decided it should be a cape. Momma Kettle is so much fun.
When we were trying to sort through the dresses, we decided we'd choose one of these. Another saleslady came over to "help", but I found her extremely annoying. She wasn't being helpful. She was just trying to take over our first lady's appointment. Knowing, they work on commission, I wasn't having that.

I dragged our first lady off to find this other dress she mentioned. That gave my mother a chance to talk the ear of the other woman, who was thankfully gone when we got back with the dress. She put my mom into the dress and she walked out in it. It was great! Just see for yourself.
Personal photo: It was a bit too large, but it was super cute. It was elegant, sexy, fun, and everything we wanted for her dress that night.

Personal photo: This fabric color is called "honey". It's a beautiful neutral color that's in the golden family. It's a chiffon fabric and will be fabulous!

Personal photo: This is the dress on the mannequin. Zoomed in so you can see the pretty swooped fabric.
We ordered the dress and and were very happy to do so. Because we got it from a bridal shop, we had to put a rush order in (+$60) to get it here in time for the wedding. But it doesn't matter, because she's got her dress.

I also want to clarify about the clothes for people who aren't bridesmaids. I think it might be a cultural difference kind of thing. But most weddings I go to at my church have everyone coordinated who's even loosely related to the wedding.

Imagine a procession of of 25 family members all dressed in white clothes and black/silver shoes. That's how things are around here. By giving my family three-four different color options for clothes and letting them pick their own jewelry and shoes with only loose guidelines for color is actually seen as easy-going.

There are people who hand-pick stuff their second cousin wears to the wedding. That's why it's good to have Weddingbee.  Hive, you keep me in perspective. I've always thought planning out clothes for the entire family was a bit crazy.

I figured making sure those who would be wearing corsages and bouts are coordinated would be pretty tame by comparison. But I decided to back off and let people wear what they want. And in typical contrary fashion, as soon as I called my grandmother to tell her it was fine is she wore silver, she said she had thought about it and decided she didn't want to be the only person in silver and would be sticking with her gold accessories. After all, she doesn't even like silver.

I'm deciding to put the women's clothes on the list with the men's tuxes. I haven't asked much about the tuxes since that fiasco. I'm 100% sure the neither Mr. Kettle nor Daddy Kettle have gotten their tuxes yet. But we're still over 100 days out, so it's no big deal, right? Right?

How was dress shopping with your mom? Have you ever gone overboard on planning other peoples' roles in your wedding? Is that just me?


Sunday, September 4, 2011

The Verdict On The Ascot

In a previous post, I talked about Mr. Kettle and his journey to get clothes for the men in the wedding party. I talked about the ascot he wanted to wear and how I was very much against it.

I put up a poll and asked if you all thought he should go with the ascot or not. Some people put up some comments that were... harsh... to say the least. Ouch guys. You know Mr. Kettle reads this blog, right? As well as his mother, Mima Kettle. You can't say those things like we're having girl time over martinis. But I digress.

Most of you seemed to think he should be able to wear what he wants since that's what I'm doing. I don't necessarily agree with that because he and I have lots of input regularly on what we wear from day to day. I checked with him to make sure he was okay with my dress length, color, and style. Believe me, if he'd wanted me in an all white trumpet gown with a 10 ft train and I didn't look terrible in it, that might be what I was wearing. But again, I digress.

The hive voted on the poll, over 100 people gave their opinions. It was about even, but now it keeps creeping in the direction of... ascot! I have to say at first this didn't make me happy. Mr. Kettle and I got into 2-3 pretty heated discussions about it. It wasn't even about the ascot (at least not on my end), but the tux in general, as well as communication between him and other male members of the wedding party. It was bad, real bad.

I think after he and I got into it at Mima and Poppa Kettle's house this past Sunday, the dams broke. He realized he was kind of being a jerk. I realized I was kind of being a jerk. We both stopped our jerkiness and came to a compromise.

Image: Compromise Cartoon via Calbuzz
 Our compromise was that he would get the ascot. Mima Kettle pointed out that he didn't have much of a neck anyways, so losing it wasn't a big deal. He will probably get a black ascot to wear with the black tuxes the men will be wearing. The groomsmen will wear black tuxes, black vests, and purple ties. The ushers will wear black tuxes, taupe vests, and taupe ties. The ring bearers will wear black tuxes, taupe vests, and taupe bow ties. Daddy Kettle and Poppa Kettle will both wear black tuxes, black vests, and black ties.

I agreed to help Mr. Kettle make sure he was getting the right colors for the suits, and he agreed to let me pester him about informing the wedding party guys of what their responsibilities are for their wedding day clothes. Here is what they'll be wearing.


Image: Perry Ellis Virgo Tux via Formally Modern Tuxedo
Hot right? They will look fantastic on their day, ascot and all. It feels good to let go of my apprehensions and not let my crazy bride brain cause a rift in otherwise happy feelings Mr. Kettle and I have had toward each other throughout the planning process.

Bride Brain Image via Tara Getting Married Blog
This particular picture can be traced back through several blogs that always source yet another blog.

How did you settle differences in wedding planning ideas? What are your guys wearing for your wedding?

Saturday, August 20, 2011

How My Wedding Dress Is Like My Future Husband

Mr. Kettle promised not to look at my wedding dress. Do you know what that means hive? Hold that thought...

Back to what I was saying. Hive, today is the day I confirm all your suspicions. I will reveal, to much fanfare, but not much surprise, my dress!

It's such a special dress. It's made for women who are either very short or very tall. Seriously, if you're 5'4"-5'8", I can't even imagine how you'd pull this off unless you have some unconventional torso-leg proportions.

I've loved this dress since the moment we put down the first down payment. Even though almost every dress I tried on looked good, this one was exceptional.

When I went for my veil consultation/size-for-ordering-confirmation, I was dying to try on the sample for my dress again. There were two other brides there. They were both trying on dresses. Again. Like, for the second and third time. Perhaps it's the indecisive person in me, but I'd never put down money on a wedding dress that I wasn't sure about.

If I were anything less than completely sure, I'd be guaranteed to be like them. I'd be back in the shop, trying on another 20 dresses. To me it's like finding a husband. You don't stop trying on dresses until you've found THE ONE. And then once you've found it, you're done. You stop shopping because you've found your heart's desire. You don't do this:

Image: India Times / Photo via Getty Images
Even if you come across others dresses you could possibly love, they end up not being enough. You don't even want to try them on. If you don't feel like this about a dress, keep looking. Of course, if you wait too long to find a dress or have an extra short engagement, the rules change.

Just like I knew almost right away my fiance was the one, I knew the same thing about this dress. And unlike a living breathing person, my dress is just waiting for me to take it home (or will be in December). Did I mention I love my wedding dress? It is unconventional, but it makes me feel like a bride like nothing else I tried on. Kind of like how Mr. Kettle makes me feel like a wife like no guy I've ever dated.

Without further ado, my dress!

Image: JA #8465 / Dress by Justin Alexander
Image also via Justin Alexander / Don't you just looooooove the detail on the bodice? And I love cummerbunds. If the guys wouldn't wear one, I certainly would!

Friday, August 12, 2011

Keeping Track Of My Handle And My Spout

I'm not exactly a Type A personality, but being organized is super important to me. Marrying a man like Mr. Kettle makes that all the more important. We each have things we forget, and of course they're different types of forgetting. That type of behavior doesn't gel with effective wedding planning.

Seeing as how we didn't want to pay money for a wedding planner, just a Day of Coordinator, it was imperative that I stayed very organized while putting together the details of my wedding.

I managed to get some big decisions handled up front. At least they seemed big at the time. Then five minutes later, I think about everything thing else left to do and that one item checked off seems like nothing. I feel this way every time.

Enter a two-fold solution: A wedding binder and a wedding website. I have both and so far I'm super glad I do. Some things I have recorded in both. Others I use just one or the other.

As I mentioned before, I got a binder from Russell and Hazel.

This Russel + Hazel wedding planner became my best friend. From Office Depot, I got a calendar, page protectors, highlighters, colored gel pens, and a briefcase. The briefcase has a dual purpose. This wedding binder will have to be carried with me everywhere I go from now until February 11th, so I wanted something to carry it in that wasn't my purse. Cause that sucker is huge!

Personal photo: This is the super cute bag I got for my binder.

Personal photo: This is the binder all full up with everything.
Personal photo: I ordered the binder in gold before I knew gold would be our accent color. I'm telling you, it pays to go with your gut.

Personal photo: Table of contents, the first big step to good organization

Personal photo: I keep business cards and color swatches in here. On the right, you'll see a piece of the tie of Mr. Kettle's that's part of our color scheme.

Keeping up with my work schedule, Easy's practice/gig schedule, plus appointments and meetings for this wedding is the biggest task with the calender, but with the highlighters, I have color coded our calendar.
Personal photo: Yeah, that's just July. Gigs, work, and meetings Oh My!
And there is also the website. I use weddingwire.com. I like that website. We looked at three different ones and Mr. Kettle picked this one. People can access all our events, RSVP to everything, sign our guest book, and even submit songs for the DJ to play!

The best part is the behind the scenes stuff though. I keep track of my wedding budget there. If it weren't for weddingwire, we wouldn't have been able to play around with the numbers to see about expanding our budget (anyone catch that hint?). I also have a very amazing to-do list there that the website generates and I use. It's much more detailed than the one from the binder.

If you're still looking to setup an organization system, I recommend href="http://shorl.com/stygrodrofuhadri">WeddingWire. You can really personalize the website for your guests, and the behind-the-scenes stuff is super useful!

Just writing this all out seems like soooooooo much to me. But it will be worth it to stay organized and on top of things. Or am I just crazy? Probably a little of column A and a little of column B.